Server setup: hardening a Ubuntu VPS before deployment
Every production deployment starts with a server that is configured for security first. A default Ubuntu VPS from DigitalOcean, Hetzner, or Linode ships with root login enabled, all ports open, no automatic security updates, and no intrusion detection. Each of these defaults is a risk. The first 30 minutes after provisioning a VPS should be spent hardening, not deploying.
Create a non-root user immediately and add it to the sudo group. Disable root SSH login by setting `PermitRootLogin no` in `/etc/ssh/sshd_config`. Configure SSH key-based authentication and disable password authentication. Install and configure UFW (Uncomplicated Firewall) to allow only ports 22 (SSH), 80 (HTTP), and 443 (HTTPS). Enable automatic security updates with `unattended-upgrades`.
Install Node.js using nvm (Node Version Manager) rather than apt — this gives you the ability to switch Node versions without root access and keeps your environment consistent with your development setup. Install PM2 globally after Node: `npm install -g pm2`. Install Nginx from apt and enable it as a system service. At this point, the server is ready for the application.
Fail2ban is a lightweight intrusion prevention tool that bans IPs after repeated failed authentication attempts. Configure it to watch SSH authentication logs and ban IPs after five failed attempts in ten minutes. This simple measure stops the majority of automated SSH brute force attacks that every internet-facing server receives continuously.
- Create a non-root sudo user immediately after provisioning — never operate as root.
- Disable SSH password authentication — key pairs only.
- Configure UFW to block all ports except 22, 80, and 443.
- Enable `unattended-upgrades` for automatic security patches.
- Install Fail2ban with SSH protection enabled.
PM2: process management for Node.js in production
PM2 is the production process manager for Node.js applications. It keeps your Next.js app running after crashes, restarts it on server reboot, manages multiple processes for CPU utilization, provides structured logs, and gives you a monitoring dashboard. Running `node server.js` directly in production is fragile — PM2 is what separates a working demo from a reliable production deployment.
Configure PM2 with an ecosystem.config.js file rather than CLI flags — this makes the configuration version-controlled and reproducible. The config specifies the app name, the script to run, the number of instances (use `'max'` to use all CPU cores), the execution mode (`cluster` for multi-core), and environment variables. Cluster mode enables load distribution across cores without any application changes.
The PM2 startup command (`pm2 startup`) generates a system service that starts PM2 (and all registered apps) automatically on server reboot. Run this command and execute the generated command with sudo — this is the step most tutorials skip, and it's the reason apps go offline after a server reboot. After generating the startup hook, run `pm2 save` to persist the current process list to disk.
PM2's log management (`pm2 logs`, `pm2 flush`) is useful for ad-hoc debugging, but production logs should be shipped to a persistent log aggregation service. Configure PM2's log module to write structured JSON logs and use a log shipper (Promtail for Loki, Filebeat for Elasticsearch) to centralize them. Local log files fill disk space and are lost on server reinstall — centralized logs survive both.
- Create an `ecosystem.config.js` file and version-control it alongside your application code.
- Use `exec_mode: 'cluster'` and `instances: 'max'` to utilize all CPU cores.
- Run `pm2 startup` and `pm2 save` to survive server reboots — this is a required step.
- Set `max_memory_restart: '1G'` to automatically restart instances that exceed a memory threshold.
- Use PM2's `--update-env` flag when deploying to ensure environment variable changes are picked up.
Nginx configuration: reverse proxy, SSL, and performance headers
Nginx sits in front of your Next.js application as a reverse proxy, handling HTTPS termination, serving static files, managing WebSocket connections, and applying security and performance headers. This configuration keeps your Node.js process focused on application logic while Nginx handles the I/O-intensive work that it's optimized for.
The core Nginx server block for a Next.js application listens on port 443 (HTTPS), proxies requests to `http://localhost:3000` (the Next.js app), and sets the standard reverse proxy headers: `X-Real-IP`, `X-Forwarded-For`, `X-Forwarded-Proto`, and `Host`. A separate server block on port 80 redirects all HTTP traffic to HTTPS with a 301 permanent redirect.
Security headers are applied at the Nginx level so they cover all responses — Next.js pages, API routes, and static assets. The essential headers: `Strict-Transport-Security` (HSTS, max-age of one year minimum), `X-Content-Type-Options: nosniff`, `X-Frame-Options: SAMEORIGIN`, `Referrer-Policy: strict-origin-when-cross-origin`, and `Permissions-Policy` restricting camera, microphone, and geolocation to none. These headers are a 10-minute configuration change that addresses a significant portion of the OWASP Top 10.
Next.js's `/_next/static/` directory contains hashed, immutable static assets — JavaScript chunks, CSS, fonts, and images. Configure Nginx to cache these assets aggressively with `Cache-Control: public, max-age=31536000, immutable`. For the Next.js application pages (non-static routes), let Next.js set its own cache headers via the headers configuration in next.config.js. Never apply long-term caching at the Nginx level to HTML responses — these need to reflect the current build.
- Set `proxy_pass http://localhost:3000` and the four standard proxy headers in your Nginx server block.
- Add HSTS, X-Content-Type-Options, X-Frame-Options, and Referrer-Policy security headers at the Nginx level.
- Cache `/_next/static/` with `max-age=31536000, immutable` — these hashed files never change.
- Never apply long-term caching to HTML responses at the Nginx level — let Next.js control page caching.
- Enable Nginx gzip compression for text/html, text/css, application/javascript, and application/json.
Let's Encrypt SSL with Certbot and automatic renewal
SSL certificates from Let's Encrypt are free, trusted by all major browsers, and automate the renewal process that made traditional certificate management so painful. Certbot, the recommended Let's Encrypt client, handles certificate issuance, Nginx configuration patching, and automatic renewal with a single command. There is no longer any reason to use self-signed certificates or to pay for basic DV certificates.
Install Certbot using snap (`sudo snap install --classic certbot`) and run `certbot --nginx -d yourdomain.com -d www.yourdomain.com`. Certbot will verify domain ownership, issue the certificate, and modify your Nginx configuration to add the SSL certificate paths and redirect HTTP to HTTPS. The modified Nginx config should be reviewed and committed to your infrastructure documentation.
Let's Encrypt certificates expire every 90 days. Certbot installs a systemd timer (or cron job) that runs `certbot renew` twice daily and only renews certificates within 30 days of expiry. Verify the timer is active with `systemctl status snap.certbot.renew.timer`. Test the renewal process without actually renewing using `certbot renew --dry-run` — this runs the full renewal logic and reports any configuration errors without touching the live certificate.
For wildcard certificates (*.yourdomain.com), Certbot requires DNS challenge verification rather than HTTP challenge — you need to add a TXT record to your DNS. This is more complex than the default HTTP challenge but is necessary when you're serving multiple subdomains from the same certificate. Most DNS providers have Certbot plugins that automate the DNS challenge.
- Install Certbot via snap and run `certbot --nginx` — it handles Nginx config patching automatically.
- Verify the auto-renewal timer with `systemctl status snap.certbot.renew.timer`.
- Test renewal with `certbot renew --dry-run` after the initial setup.
- Use wildcard certificates for multi-subdomain deployments to avoid managing multiple certificates.
- Monitor certificate expiry with a monitoring service (UptimeRobot, Checkly) that alerts on SSL expiry.
GitHub Actions CI/CD: zero-downtime deploys
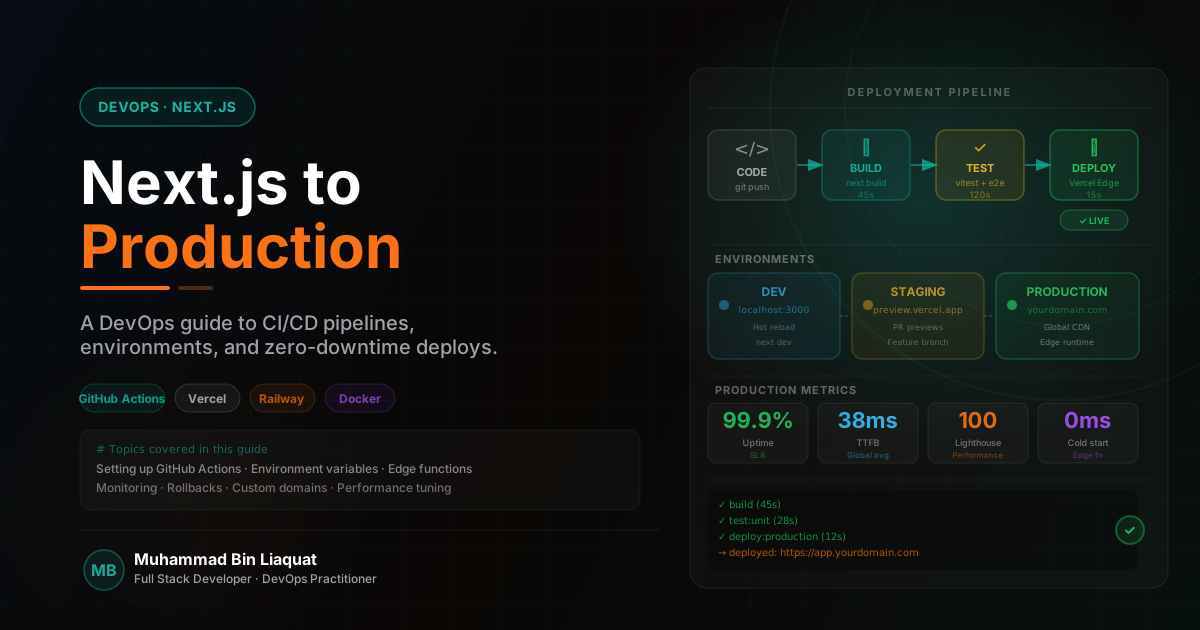
A GitHub Actions workflow that builds, tests, and deploys your Next.js application on every push to main is the final piece of a production-ready setup. Without CI/CD, deployments are manual, error-prone, and blocked on whoever has SSH access. With it, any team member can ship a change by merging a pull request, with confidence that tests have passed and the deployment is reproducible.
The deployment workflow has three stages: build (install dependencies, run the TypeScript compiler, run tests, run next build), transfer (rsync the build artifacts to the server, excluding node_modules and the .next cache), and restart (SSH into the server, install production dependencies, run database migrations, and execute `pm2 reload ecosystem.config.js --update-env`). The PM2 reload command performs a zero-downtime restart using cluster mode — new processes start before old processes are stopped.
Store sensitive deployment values in GitHub repository secrets: `SERVER_HOST`, `SERVER_USER`, `SSH_PRIVATE_KEY`, `DATABASE_URL`, and any third-party API keys. The workflow accesses these via `${{ secrets.SECRET_NAME }}` syntax — they're never exposed in logs or committed to the repository. The SSH_PRIVATE_KEY should correspond to a deployment-specific key pair that has restricted permissions on the server.
Add a health check step at the end of the deployment workflow: curl the application's health endpoint (`/api/health`) and fail the workflow if it returns anything other than 200. This creates an automatic rollback signal — if the health check fails, the previous PM2 process is still running (cluster mode starts new, then stops old), and the failed deployment is visible in the GitHub Actions interface for immediate investigation.
- Store all secrets in GitHub repository secrets — never in workflow YAML files.
- Create a deployment-specific SSH key pair with write access only to the deployment directory.
- Use `pm2 reload` (not `pm2 restart`) for zero-downtime deploys in cluster mode.
- Add a health check HTTP request as the final step — fail the workflow if the app doesn't respond 200.
- Run `next build` in CI before deploying — never build on the server where a failed build causes downtime.
Share this article
Help others discover this resource and extend the reach of the content.