Choosing the right architecture from day one
React Native gives you a single codebase for iOS and Android, but the architecture choices you make early determine whether that promise holds at production scale. The file structure, navigation setup, and state management pattern you commit to on day one will be load-bearing throughout the project — not just for the initial build, but for every feature addition, platform-specific fix, and performance optimization that follows.
The architecture that consistently works for production React Native apps is a feature-based folder structure with clear boundaries between domain logic and UI. A `src/features/` directory contains self-contained feature modules — each with its screens, components, hooks, and local state. A `src/shared/` directory contains cross-cutting utilities: theme, navigation types, API client, and reusable components. This structure scales to large teams because each feature module can be owned and evolved independently.
The decision between Expo managed workflow and bare React Native workflow deserves serious consideration at project start. Expo's managed workflow dramatically reduces native build complexity — no Xcode or Android Studio configuration required for most use cases — and is the right default for most new projects. The bare workflow is necessary when you need native modules not available in Expo, or when you need full control over the native build process. Starting managed and ejecting when needed is a valid approach, but ejecting has non-trivial cost.
TypeScript is non-negotiable in production React Native. Navigation prop types, screen param definitions, API response shapes, and native module return types all benefit from compile-time checking. The React Navigation library has excellent TypeScript support with typed navigation stacks — define your navigator's param list once and the compiler catches incorrect navigation calls across the entire application.
- Use Expo managed workflow by default — only eject to bare when a specific native module requires it.
- Structure the codebase by feature, not by type — screens and components for a feature belong in the same directory.
- Define a typed root navigator param list at project start and enforce it with strict TypeScript settings.
- Set up path aliases (@ for src) from day one to avoid relative import chains across feature boundaries.
- Commit to one state management solution before building features — switching patterns mid-project is expensive.
Navigation architecture: React Navigation patterns that scale
Navigation is the backbone of a mobile application — it connects every screen, manages the back stack, and controls how deep links resolve to the correct destination. React Navigation is the standard for React Native, but using it well at scale requires deliberate architectural decisions beyond just installing the library and defining screens in a single file.
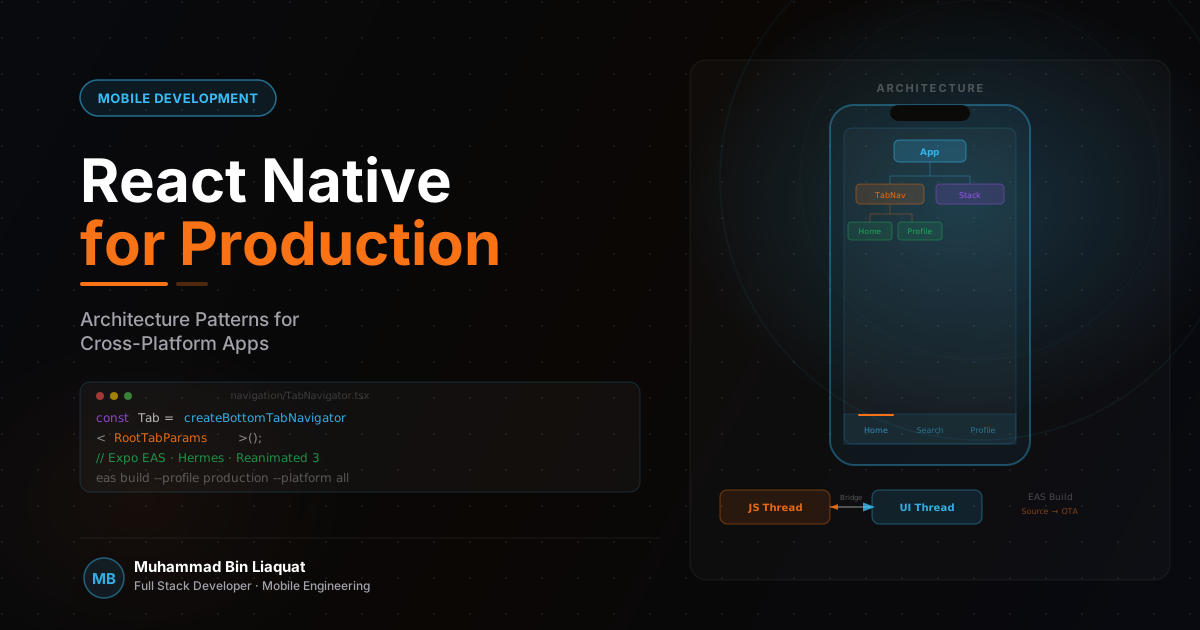
The structure that works for complex applications is a nested navigator hierarchy with clear ownership boundaries. A root navigator handles authentication state — a Stack navigator that renders either the auth flow or the main app tab navigator depending on auth status. The main tab navigator contains tab-specific stacks. Each tab stack is defined in its own file with its own typed param list. This separation makes it easy to reason about navigation within a feature without needing to understand the entire app's navigation structure.
Deep links require a navigation structure that can map URL patterns to specific screens consistently. Configure universal links for iOS and app links for Android early — retrofitting deep link support into a navigation structure that wasn't designed for it requires significant restructuring. Define your deep link URL scheme before building screens, using a URL hierarchy that mirrors the navigation hierarchy so that the two never diverge.
The header and tab bar customization is where the design system meets navigation. React Navigation's theming system allows consistent header styling across the entire app, while screen-specific options can override defaults for individual screens. Define the base theme configuration once in a navigation theme file and use it as the default for every navigator — this ensures header colors, back button labels, and transition animations are consistent without per-screen customization.
- Define the full navigator hierarchy before building screens — navigation structure is expensive to refactor.
- Use typed navigator param lists for every stack and tab navigator.
- Configure deep links from the beginning using a URL hierarchy that mirrors the navigation structure.
- Define navigation theme and header defaults centrally — never configure header styles per-screen unless necessary.
- Test deep link resolution on both iOS and Android before release — the configurations are platform-specific.
State management and offline-first data fetching
Mobile state management has different constraints than web. The user can background and foreground the app, the OS can terminate and restart processes, and network conditions change constantly — from WiFi to LTE to offline and back. State management in React Native must be designed for these realities, not assumed to behave like a persistent browser tab.
TanStack Query (React Query) has become the standard for server state management in React Native, and for good reason. It handles caching, background refetching, optimistic updates, and offline queue management in ways that reduce hundreds of lines of custom state management code to a few hooks. The library's persistQueryClient plugin integrates with AsyncStorage or MMKV to persist query cache across app restarts — so users see data immediately on reopen even before the network request completes.
For local UI state and global application state, Zustand is the lightweight option that works well with React Native's architecture. Unlike Redux, Zustand requires minimal boilerplate and supports slices without a reducer pattern. It integrates cleanly with MMKV for persistence, which is significantly faster than AsyncStorage for large state objects. For applications with complex client-side data flows — multi-step forms, shopping cart state, user preferences — a Zustand store with TypeScript-typed slices provides a clean, testable data model.
Offline support is an expectation in mobile, not an enhancement. Applications that display empty states or error screens when offline provide a significantly worse experience than those that serve cached data gracefully. Design data fetching with an offline-first mindset: every read operation should serve from cache first and refetch in the background, and write operations should queue when offline and sync when connection is restored. TanStack Query's networkMode and mutation retry configurations make this achievable without a custom offline synchronization layer.
- Use TanStack Query for all server state — its caching and background refetch eliminate most custom state management.
- Persist the TanStack Query cache with persistQueryClient to serve data immediately on app reopen.
- Use Zustand for local application state — it integrates cleanly with MMKV for fast, typed persistence.
- Design all read operations to serve from cache first — offline experience is a first-class mobile concern.
- Queue write operations when offline using TanStack Query's networkMode and retry configuration.
Native module integration and bridging
React Native's bridge (and the new architecture's JSI) enables access to platform APIs that are not exposed through JavaScript — camera, biometrics, push notifications, background processing, and platform-specific sensors. The decision of whether to use an existing library, adopt Expo's module ecosystem, or write a custom native module depends on the module's complexity and how much control you need over the underlying implementation.
Expo's module ecosystem covers the majority of common native integrations — camera, local notifications, secure storage, sensors, and file system access. These modules are maintained by the Expo team with consistent APIs across iOS and Android, and they work in both managed and bare workflow. Prefer Expo modules over community alternatives when available — the API quality and long-term maintenance are typically superior and the migration path to new React Native versions is cleaner.
For native integrations not covered by Expo, community libraries like react-native-vision-camera (advanced camera), react-native-ble-plx (Bluetooth), and react-native-maps are production-proven options. When evaluating a native library, check the number of open issues, the last commit date, whether it supports the new architecture (Fabric/JSI), and whether it has a dedicated maintainer. Libraries that haven't been updated for the new architecture will become blocking issues as React Native's migration progresses.
Writing custom native modules is necessary for integrations with proprietary SDKs — hardware vendors, payment processors with custom flows, or internal services with Android/iOS-specific implementations. Expo's module API provides a cleaner developer experience than the legacy native module system and generates significantly less boilerplate. For performance-critical native code, the JSI (JavaScript Interface) enables synchronous communication with native without bridge serialization overhead.
- Prefer Expo modules over community alternatives for common native integrations.
- Check new architecture (Fabric/JSI) compatibility before adopting any native library.
- Use Expo's module API for custom native modules rather than the legacy NativeModules system.
- Test native module integrations on real devices early — simulators do not accurately represent all native behaviors.
- Document the minimum iOS and Android versions your native dependencies require — they constrain app compatibility.
Performance optimization for smooth interactions
React Native applications render UI through a bridge between JavaScript and the native layer, and the performance characteristics are different from web. The most common performance issues — dropped frames, slow list scrolling, sluggish transitions — are almost all caused by excessive JavaScript work on the main thread. Understanding the rendering model is essential for diagnosing and fixing these issues effectively.
FlatList and SectionList are the performance-correct components for long scrollable lists in React Native. Never use ScrollView with a map over a large array — this renders all items simultaneously, which causes severe memory and frame rate issues on lists with more than 50 items. FlatList renders only the items currently visible plus a configurable window. Configure windowSize, maxToRenderPerBatch, and initialNumToRender based on your item height and viewport size — the defaults are conservative and often need tuning for specific layouts.
The Hermes engine (the default JavaScript engine since React Native 0.70) significantly reduces startup time and memory footprint compared to its predecessor. Hermes compiles JavaScript to bytecode at build time, eliminating the startup JIT compilation cost. Enable Hermes in both managed and bare workflow configurations — it's the right default for all production applications and measurably reduces cold start time.
Animations should always run on the native thread using Animated with useNativeDriver: true, or with the Reanimated library for complex gesture-driven animations. JavaScript-driven animations drop frames under load because they must cross the bridge on every frame. Reanimated 3 runs animation worklets entirely on the UI thread — enabling 60fps animations regardless of JavaScript thread activity, which is critical for applications with complex interactions or real-time data updates.
- Always use FlatList or SectionList for long lists — never ScrollView with mapped items.
- Configure FlatList's windowSize and initialNumToRender based on actual item height and scroll behavior.
- Enable Hermes in all React Native applications — it reduces startup time and memory footprint.
- Use `useNativeDriver: true` on all Animated values, or use Reanimated 3 for complex gesture animations.
- Use the React Native Performance Monitor (shake device in dev) to identify dropped frames.
Deployment, OTA updates, and CI/CD for React Native
React Native apps require deployment to two separate stores with different review processes, build systems, and version management requirements. A production-ready CI/CD pipeline handles the complexity of building, testing, signing, and distributing for both platforms without manual intervention. The investment in automation pays back immediately on the first production release when manual distribution would otherwise take hours.
EAS (Expo Application Services) is the standard build and distribution platform for React Native applications. EAS Build handles both managed and bare workflow projects, manages signing credentials in the cloud, and integrates with GitHub Actions or other CI systems. EAS Submit automates the store submission process for both App Store Connect and Google Play. For applications using Expo, EAS is the path-of-least-resistance to production with the least infrastructure overhead.
Over-the-air (OTA) updates allow shipping JavaScript and asset changes without requiring a full app store review. EAS Update (for Expo) and CodePush (for bare React Native) both enable this capability. OTA updates are invaluable for shipping bug fixes and content updates without the 24-48 hour App Store review delay. Define a clear policy for when to use OTA versus a native build — OTA is appropriate for JavaScript changes, never for native module updates or API version changes that affect minimum OS requirements.
End-to-end testing on real devices is essential before each release. Detox provides an end-to-end testing framework for React Native that runs tests on actual iOS simulators and Android emulators. Define a core test suite covering the primary user flows — authentication, the main feature loop, and any payment or critical data submission flows — and run it in CI on every pull request. Manual testing on a real device for at least the happy path remains important even with a strong automated test suite.
- Use EAS Build and EAS Submit for automated iOS and Android builds and store submissions.
- Configure OTA updates with EAS Update for fast JavaScript fixes without app store review delays.
- Define a policy: OTA updates for JS changes only, native builds for any native code or minimum version changes.
- Run Detox end-to-end tests on the core user flows in CI — every pull request before merge.
- Test on a real device before every major release — simulators do not reproduce all production behaviors.
Share this article
Help others discover this resource and extend the reach of the content.