Measure first: the performance profiling baseline
Every performance engagement starts the same way: run Lighthouse in an incognito window, open the React DevTools Profiler, and examine the Network waterfall in Chrome DevTools. These three tools together reveal where time is actually being spent. Without a baseline measurement, optimization work is guesswork — it's possible to spend hours memoizing components that were never the bottleneck while the real performance problem sits elsewhere.
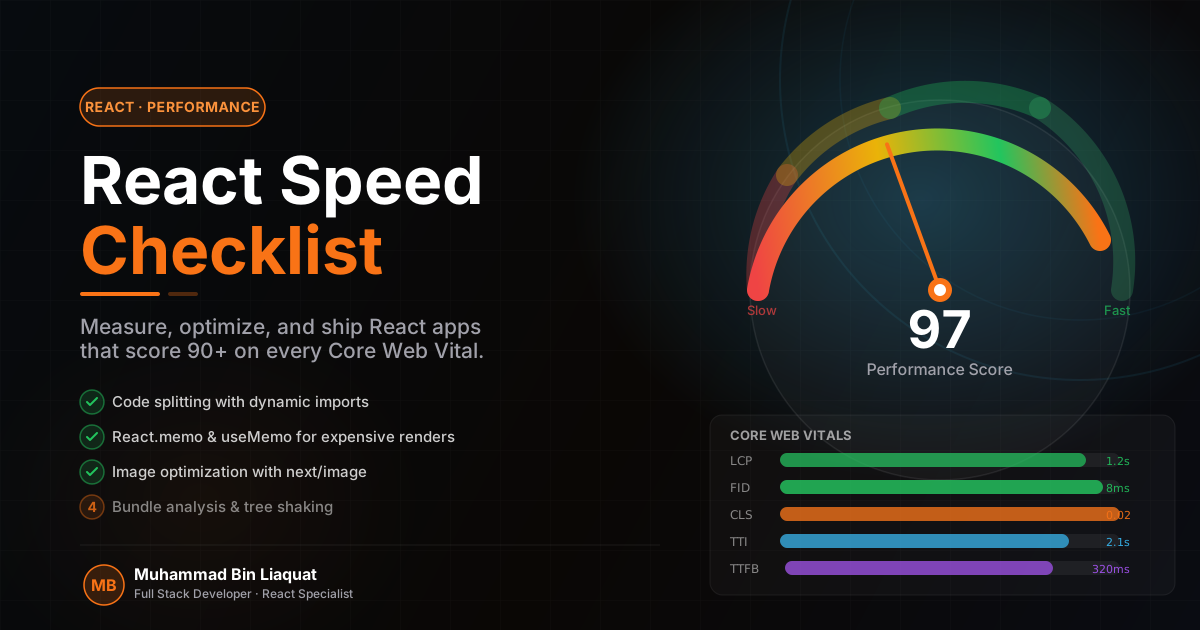
The Web Vitals metrics to track are Largest Contentful Paint (LCP), Interaction to Next Paint (INP, which replaced FID in 2024), and Cumulative Layout Shift (CLS). LCP measures how quickly the largest visible element renders — for most SaaS UIs and marketing pages, this is a hero image or headline block. INP measures responsiveness to user interaction. CLS measures visual stability — whether elements shift position as the page loads.
The React DevTools Profiler deserves dedicated attention for diagnosing unnecessary re-renders. Record a profile while performing a typical user action — a form input, a route change, a filter selection — and look for components that render when they had no reason to. Each unnecessary render is a tax on interaction speed, and on complex UIs with many components in the tree, these taxes compound into noticeable lag.
Set up real user monitoring (RUM) alongside Lighthouse. Tools like Vercel Analytics, Sentry Performance, or the native web-vitals library give field data from actual user devices and network conditions — which is what Google actually measures for Core Web Vitals ranking signals and what reflects the experience of users across diverse environments.
- Run Lighthouse in incognito mode on every major route to avoid extension interference.
- Use the React DevTools Profiler Flamegraph to identify components with long render times.
- Record the initial page load Network waterfall and identify render-blocking resources.
- Install the web-vitals npm package to log LCP, INP, and CLS from real browsers in production.
- Establish a performance budget: LCP under 2.5s, INP under 200ms, CLS under 0.1.
Code splitting and lazy loading: ship less JavaScript
The single most impactful performance improvement in most React applications is reducing the amount of JavaScript shipped on the initial page load. React.lazy() combined with Suspense makes it straightforward to split heavy components into separate chunks that load only when needed. A modal, a rich text editor, a chart library — none of these need to be in the main bundle if they're not visible on first render.
In Next.js specifically, the dynamic() import function wraps React.lazy with SSR support and is the standard approach. Setting { ssr: false } is appropriate for components that depend on browser APIs, while the default SSR-enabled mode handles most other cases. Route-level splitting is handled automatically by Next.js's file-based routing — each page file becomes its own chunk — but component-level splitting within a page requires explicit dynamic imports.
Audit bundles regularly using next build with the ANALYZE=true environment variable, which generates a visual treemap via @next/bundle-analyzer. Common findings include: the entire date-fns library imported instead of specific functions, a full icon library bundled when only three icons are used, or a heavy utility library included when native array methods would suffice.
Tree shaking eliminates unused exports, but only works with ES module syntax. If a dependency uses CommonJS (require), its entire module is included regardless of what you import from it. Check the bundlephobia.com profile of any new dependency before adding it — the tree shaking badge tells you whether selective imports will work and shows the real cost added to the bundle.
- Wrap heavy route-specific components with `dynamic()` imports in Next.js.
- Use `{ ssr: false }` for components that use browser-only APIs like window or document.
- Run `ANALYZE=true next build` and look for any single dependency over 50KB in the main chunk.
- Replace full lodash imports with individual function imports: `import debounce from 'lodash/debounce'`.
- Preload the next likely route on hover using Next.js's Link component's built-in prefetch behavior.
Memoization: when to use React.memo, useMemo, and useCallback
Memoization is widely misapplied in React — both overused and underused at the same time. The rule: memoize when a component re-renders frequently due to parent updates, and when that re-render is measurably expensive in terms of computation or DOM reconciliation. Wrapping every component in React.memo by default does not improve performance — it adds comparison overhead that can actually slow things down when props change on every render anyway.
React.memo is most valuable at component boundaries where props are stable but the parent re-renders often — like a list item component inside a frequently updating list, or a sidebar that receives static props but lives inside a layout that updates with user input. Always pair React.memo with useCallback for any function props passed to the memoized component, because a new function reference on every render defeats the memo comparison.
useMemo is for expensive computations — filtering or sorting large arrays, computing derived state, or constructing complex objects referenced in render. The practical threshold: if a computation takes more than 1ms in the Profiler, it's a candidate for memoization. Below that threshold, the memoization overhead is comparable to just recomputing. Never use useMemo for primitive values or simple property access — the net effect is negative.
useCallback stabilizes function references between renders. Its primary use case is passing callbacks to memoized child components or to useEffect dependency arrays. Without useCallback, a function defined in a component body gets a new reference on every render, triggering re-renders in memoized children that receive it as a prop and causing effects that depend on it to re-run unnecessarily.
- Profile before memoizing — verify the component actually re-renders unnecessarily using React DevTools.
- Always pair `React.memo` with `useCallback` for function props to avoid defeating the optimization.
- Use `useMemo` for array filter/sort operations on large datasets (500+ items).
- Avoid `useMemo` for values that are cheap to compute — strings, numbers, simple property lookups.
- Use the React DevTools 'Why did this render?' feature to confirm memoization is working as intended.
Image optimization and Core Web Vitals: CLS and LCP
Images are almost always the largest contributor to both LCP and CLS. The fixes are well-established but frequently skipped under deadline pressure. In Next.js, the Image component handles most of this automatically: it generates WebP and AVIF versions, implements lazy loading by default, and accepts width and height props that reserve layout space before the image loads — eliminating the CLS caused by images that shift content as they appear.
LCP is determined by the single largest element visible in the viewport at load time. For most marketing and application pages, this is the hero image or the primary heading. Ensure the LCP element loads as fast as possible: use priority on the Next.js Image component for above-the-fold images, avoid CSS background-image for LCP elements since they cannot be preloaded, and serve images from a CDN rather than the same origin as the application server.
CLS is caused by elements rendering at different sizes than their final layout. The most common sources: images without explicit dimensions, web fonts that swap after load causing text reflow, and dynamically injected content like banners or cookie notices that push other elements down. Fix font swapping with font-display: optional for decorative fonts and font-display: swap for body text. Reserve space for asynchronous UI elements using min-height before content loads.
For SVGs used as illustrations or article covers, inline them when the file is small and reused in multiple places, or load them as img tags with explicit width and height for larger files. Avoid SVGs as CSS background-images on elements with content-dependent dimensions — this is a common source of unexpected layout shifts on slower connections.
- Add the `priority` prop to the first above-the-fold Next.js Image component on every route.
- Always provide explicit `width` and `height` to Next.js Image — never size images with CSS alone.
- Use `font-display: swap` for body fonts and `font-display: optional` for non-critical decorative fonts.
- Test CLS on a throttled connection (Slow 4G in DevTools) to surface shifts that fast connections hide.
- Run PageSpeed Insights on the actual deployed URL — not localhost — before any major release.
Server components and the React rendering model
React Server Components, stable in Next.js 13+ App Router, fundamentally change the performance calculus for data-heavy pages. Server components render on the server, send HTML to the client, and contribute zero JavaScript to the client bundle. For article pages, product listings, and any content that does not require interactivity, server components eliminate hydration cost entirely — the page is rendered and interactive immediately.
The practical rule in App Router: everything is a server component by default. Add 'use client' only when you need hooks (useState, useEffect, useRef), browser APIs, or event handlers. Keep client components as leaf nodes — small interactive islands — and let server components handle data fetching and layout. This architecture produces dramatically smaller client bundles compared to the equivalent Pages Router setup.
Data fetching in server components uses native fetch with Next.js's extended caching system. Fetch calls automatically deduplicate within a render pass, and caching options (cache: 'force-cache', next: { revalidate: 3600 }) give granular control over whether data is static, incrementally regenerated, or always fresh. This replaces client-side data fetching libraries for most cases involving page-level data.
Streaming with Suspense boundaries lets you send the page shell to the browser immediately while streaming slower-loading sections progressively. Wrap each data-dependent section in a Suspense boundary with a meaningful skeleton fallback — one that matches the eventual content's shape — to avoid blank states while maintaining fast Time to First Byte.
- Default to server components in Next.js App Router — only use `'use client'` when hooks or event handlers are required.
- Fetch data in server components using async/await instead of useEffect and client-side fetching.
- Wrap each independently data-dependent section in a Suspense boundary to enable streaming.
- Use `next: { revalidate: N }` on fetch calls for ISR — serve stale content immediately while revalidating.
- Check the client bundle size using Chrome DevTools Coverage tab after adding any new client component.
Share this article
Help others discover this resource and extend the reach of the content.